About this mod
Forge Weapons, Armor, and Ingots. Extended functionality for Armorer. Zero conflicts with Weapon/Armor mods.
- Requirements
- Permissions and credits
- Changelogs
INFINITUM - COMPENDIUM


IMPERIAL LEGION - INFINITUM

CONTENT:
- A fully functioning Smithing system.
- A fully custom menu, mouse-navigable in Unreal Engine 5.
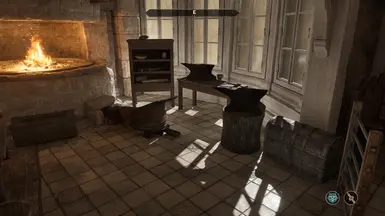
- Brand new Smithing Workstation(s), in every Major City and the Shivering Isles.
- Tiered Ores, discoverable in all Silver and Gold Ore Veins.
- Tiered Ingots, craftable at the Anvil.
- Extended Armorer Skill functionality.
- Zero conflicts with Weapon and Armor mods.
SMITHING - HOW IT WORKS

SMITHING CHEST - Every Smithing Workstation has its own special Smithing Chest, where you store all the items you want the Leather Rack or Equipment Smelter to process. All Smithing Chests are safe containers, so no worries about vanishing items!
SMITHING ANVIL - Interacting with the Smithing Anvil will open the UE4SS Smithing Menu, where you can navigate by tabbing and scrolling to find your desired item. You can only craft one item at a time, and it checks the player's inventory for required materials - it does not check the Smithing Chest.
EQUIPMENT SMELTER - With the Equipment Smelter, you can melt down all non-unique Vanilla Armor and Weapons into materials with which you can craft new items. The Smelter at every workstation will check its specific workstation's Smithing Chest for items to melt down. Salvaged materials are deposited into the player's inventory.
LEATHER RACK - Here you can process Wolf Pelts, Bear Pelts, Lion Pelts, Scamp Skin, and Daedra Silk. Every Leather Rack will check its specific workstation's Smithing Chest for materials to process. Crafted items are deposited into the player's inventory.
HOW DO I KNOW WHAT MATERIALS I NEED?
for each item you hover over with the mouse. No more pesky book reading! So long, Smithing Workbook!

If you have 1 Leather and 2 Silver Ingots in your inventory (not Smithing Chest), and your Armorer Skill is at least 50, you can craft the Silver Shortsword.
If you decide the craft the Silver Shortsword and click the button, the Custom Menu will close, and the Anvil will enter a Hot State while your command is processed.
If your Skill is found insufficient, you will be informed via an in-game Message Box. If your Materials are found insufficient, you will be informed via an in-game Message Box. In both of these situations, the Anvil will re-enter its Cooled State and you will be able to re-open the Custom Menu by activating the Anvil.
If you have enough Materials and Skill Level, the Materials will be removed from your inventory and the Silver Shortsword will be added to your inventory. The Anvil will then re-enter its Cooled State, and you will be able to re-open the Custom Menu by activating the Anvil.
FAQ:
- This mod is only compatible with the Nexus version of UE4SS as defined in the Requirements. The general github release of UE4SS guts critical Console Commands.
- This mod is incompatible with UE4SS Game Settings Loader - it breaks Lua hooks and causes crashes for mods that use Lua.
- Whenever the Smithing Menu first opens, the Mouse Cursor is invisible. You can make it visible by clicking one of the Tabs. Working on a fix for this.
- Controller Support is being worked on.
- I encountered no issues during testing, but I'm not perfect. If you encounter any unintended behavior (crashes are not caused by my mod), file a Bug Report!
INSTALLATION INSTRUCTIONS:
1) Install OBSE64 (Optional) - a requirement for NL-Tag Remover.
2) Install NL-Tag Remover (Optional) - removes ugly [NL] tags from new text strings.
3) Install UE4SS for Oblivion Remastered (REQUIRED) - the Custom Menu and TesSyncMapInjector will not function without it.

4) Install UE4SS TesSyncMapInjector (REQUIRED) - all mods that add items with new FormIDs require this.

5) Download the .zip file for this mod.
6) From inside of the .zip file, drag and drop the OblivionRemastered folder into ->

7) Add Smithing.esp to your plugins.txt in Oblivion Remastered\OblivionRemastered\Content\Dev\ObvData\Data.
8) You are ready to play!


